
Minimum requirements
In order to user our SDK, you must use it on an Android project with a minSdkVersion at least at API level 23 (Marshmallow 6.0) or higher. To build your own Android's application, we recommend you to use Android Studio as your IDE.
In order to help you with the SDK, you will find an integration example with sources codes :
1. Download our MapSDK
First, you need to download our MapSDK to integrate it in your project :
https://fnoproduction.blob.core.windows.net/sdk/android/1.5.27/20230209__FNOSDK__Android_1.5.27.aar
Ask us a token in order to try our demo through this email : business@findnorder.com
Then you need to go to your build.gradle (Module: app) in order to configure your dependencies :
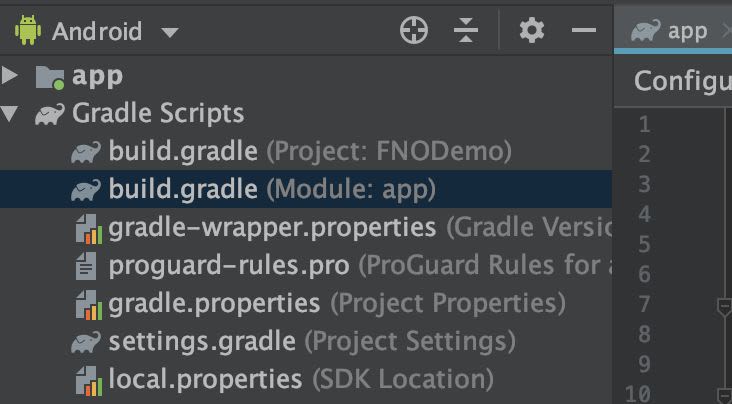
Then in your dependencies block at the bottom of your Gradle file, you need to replace your first line by :
dependencies {
implementation fileTree(dir: 'libs', include: ['*.jar', '*.aar'])
//If you have other dependencies, please add it below
}
dependencies {
implementation fileTree(dir: 'libs', include: ['*.jar', '*.aar'])
//If you have other dependencies, please add it below
}
Adding this line allows you to use your map and our SDK to interact with your map.
3. Add our MapSDK
Then you need to provide your map and our MapSDK in your Android project. In order to do that, switch your file tree in project mode and then place sdk.aar file in the app/libs/directory like this :
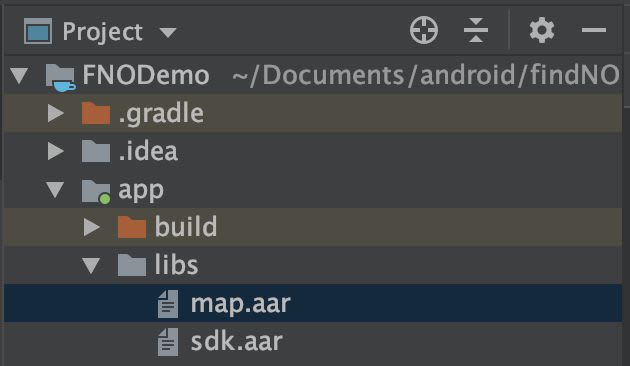
sdk.aar : represents all the methods in order to interact with the map displayed
Once you have added those files in your Android project, you need to refresh it by syncing your Gradle's project files by clicking on this button :
Congratulations! Once synced, our SDK is ready to be used. Now, you need to configure them.
4. Add your client token
When we provide you a map, there are always :
A client's token
A map's identifier
Those informations are used to uniquely identified your map and communicates properly with our SDK. So, you need to both in your Android project.
First, go to your values/strings.xml file and add your client's token :
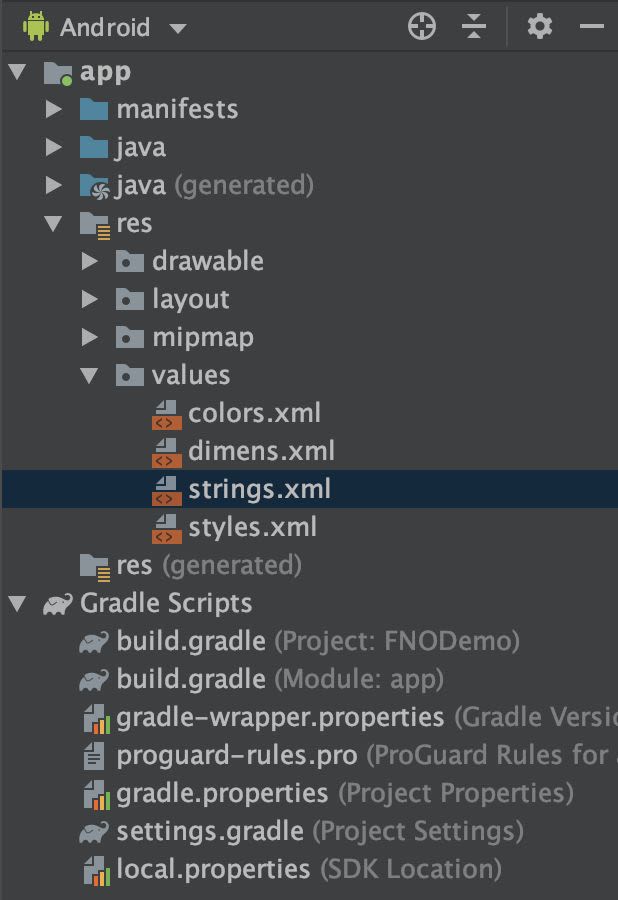
<resources>
<string name="client_token">"PUT HERE YOUR CLIENT TOKEN"</string>
//If you have other properties, please add it below
</resources>
<resources>
<string name="client_token">"PUT HERE YOUR CLIENT TOKEN"</string>
//If you have other properties, please add it below
</resources>
You also need to add another line in your values/strings.xml to avoid some errors when loading your map :
<resources>
<string name="client_token">"PUT HERE YOUR CLIENT TOKEN"</string>
<string name="game_view_content_description">Game view</string>
//If you have other properties, please add it below
</resources>
<resources>
<string name="client_token">"PUT HERE YOUR CLIENT TOKEN"</string>
<string name="game_view_content_description">Game view</string>
//If you have other properties, please add it below
</resources>
Now you can access your client's access directly from your values/strings.xml. Now, you need to configure your AndroidManifest.xml.
5. Initialize in your Application and Activity classes
In your Application class:
In your Activity class :
Here is how you can do both :
public class App extends Application {
@Override
public void onCreate() {
super.onCreate();
MapFNO.setEnvironmentForAPI(WebEnvironment.DEV); // PROD by default
MapFNO.init("<token>");
}
}
public class MainActivity extends Activity {
@Override
public void onCreate(Bundle savedInstanceState) {
super.onCreate(savedInstanceState);
setContentView(R.layout.activity_main);
MapFNO.startModuleMap(this);
}
@Override
protected void onResume() {
super.onResume();
map.onResume()
}
@Override
protected void onPause() {
super.onPause();
map.onPause();
}
}
Configuring your AndroidManifest.xml allows you to avoid conflicts with your map and SDK when you compiles your project. So, go to your AndroidManifest.xml :
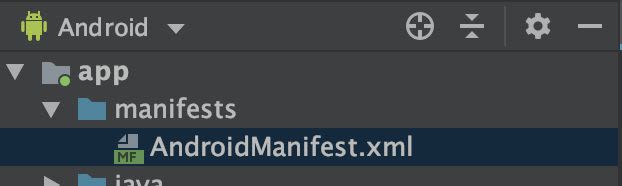
You need to add internet permission and camera permission like this :
<manifest xmlns:android="http://schemas.android.com/apk/res/android" xmlns:tools="http://schemas.android.com/tools"
package="com.fno.demo">
<uses-permission android:name="android.permission.INTERNET" />
<uses-permission android:name="android.permission.CAMERA" />
<uses-feature android:glEsVersion="0x00020000"/>
<application
//Your other properties
</application>
</manifest>
<manifest xmlns:android="http://schemas.android.com/apk/res/android" xmlns:tools="http://schemas.android.com/tools"
package="com.fno.demo">
<uses-permission android:name="android.permission.INTERNET" />
<uses-permission android:name="android.permission.CAMERA" />
<uses-feature android:glEsVersion="0x00020000"/>
<application
//Your other properties
</application>
</manifest>
That's it! You are ready to load and display your map and interact with it thanks to our SDK.
7. Load and display your map
A map is represented by the MapFNO's class. To display your map, you need to add a MapFNO's object to your layout :
<findnorder.MapFNO
android:id="@+id/map"
android:layout_width="match_parent"
android:layout_height="match_parent" />
<findnorder.MapFNO
android:id="@+id/map"
android:layout_width="match_parent"
android:layout_height="match_parent" />
Then when you set your content view in your activity or fragment, you can retrieve and instantiate your MapFNO's instance. Once you instantiate your MapFNO's instance, you can use the method called displayMapWithId to display your map by passing as a parameter your map's identifier and a callback in order to know when the map is ready to be displayed :

import findnorder.MapFNO
public class MyActivity extends Activity {
private MapFNO map;
@Override
protected void onCreate(Bundle savedInstanceState) {
super.onCreate(savedInstanceState);
setContentView(R.layout.activity_main);
map = findViewById(R.id.map);
map.displayMapWithId("ID_OF_YOUR_MAP", new MapFNO.CallbackLoadMap() {
@Override
public void onMapReady() {
//Interact with your map
}
});
}
}
import findnorder.MapFNO
import kotlinx.android.synthetic.main.activity_main.*
class MainActivity : AppCompatActivity() {
override fun onCreate(savedInstanceState: Bundle?) {
super.onCreate(savedInstanceState)
setContentView(R.layout.activity_main)
map.displayMapWithId("ID_OF_YOUR_MAP") {
//Interact with your map
}
}
}
Before interacting with your MapFNO's instance, you need to be sure that your map is ready to be displayed. So interact with your map only after onMapReady's callback was called. If not, you are going to face some issues.
Congratulations! Your map is loaded and ready to be displayed. You can interact with it thanks to our SDK. If you want to know more about our SDK, please go to the next section dedicated to our SDK methods.